Process:
- Machine a mold with machinable wax (positive image). Remember that you are going to create a two sided mold.
- Create the negative mold out of silicon rubber (e.g. Oomoo 25)
- Cast the final piece out of urethane plastic (e.g. Smooth Cast 310)
Mold design
- Use any 3D modelling to create the mold software: Fusion, Tinkercad, Freecad ... . Export it as STL
- You need to do your 3d piece and then put inside a box container. You can make the box container for instance using the shell tool from Fusion 360.
- When you do the design consider the following issues:
-
Registration: If you are fabricating two part molds, you need to ensure that both molds are brought together in the right position. Neil's like that the registration is integrated into the design: See for instance
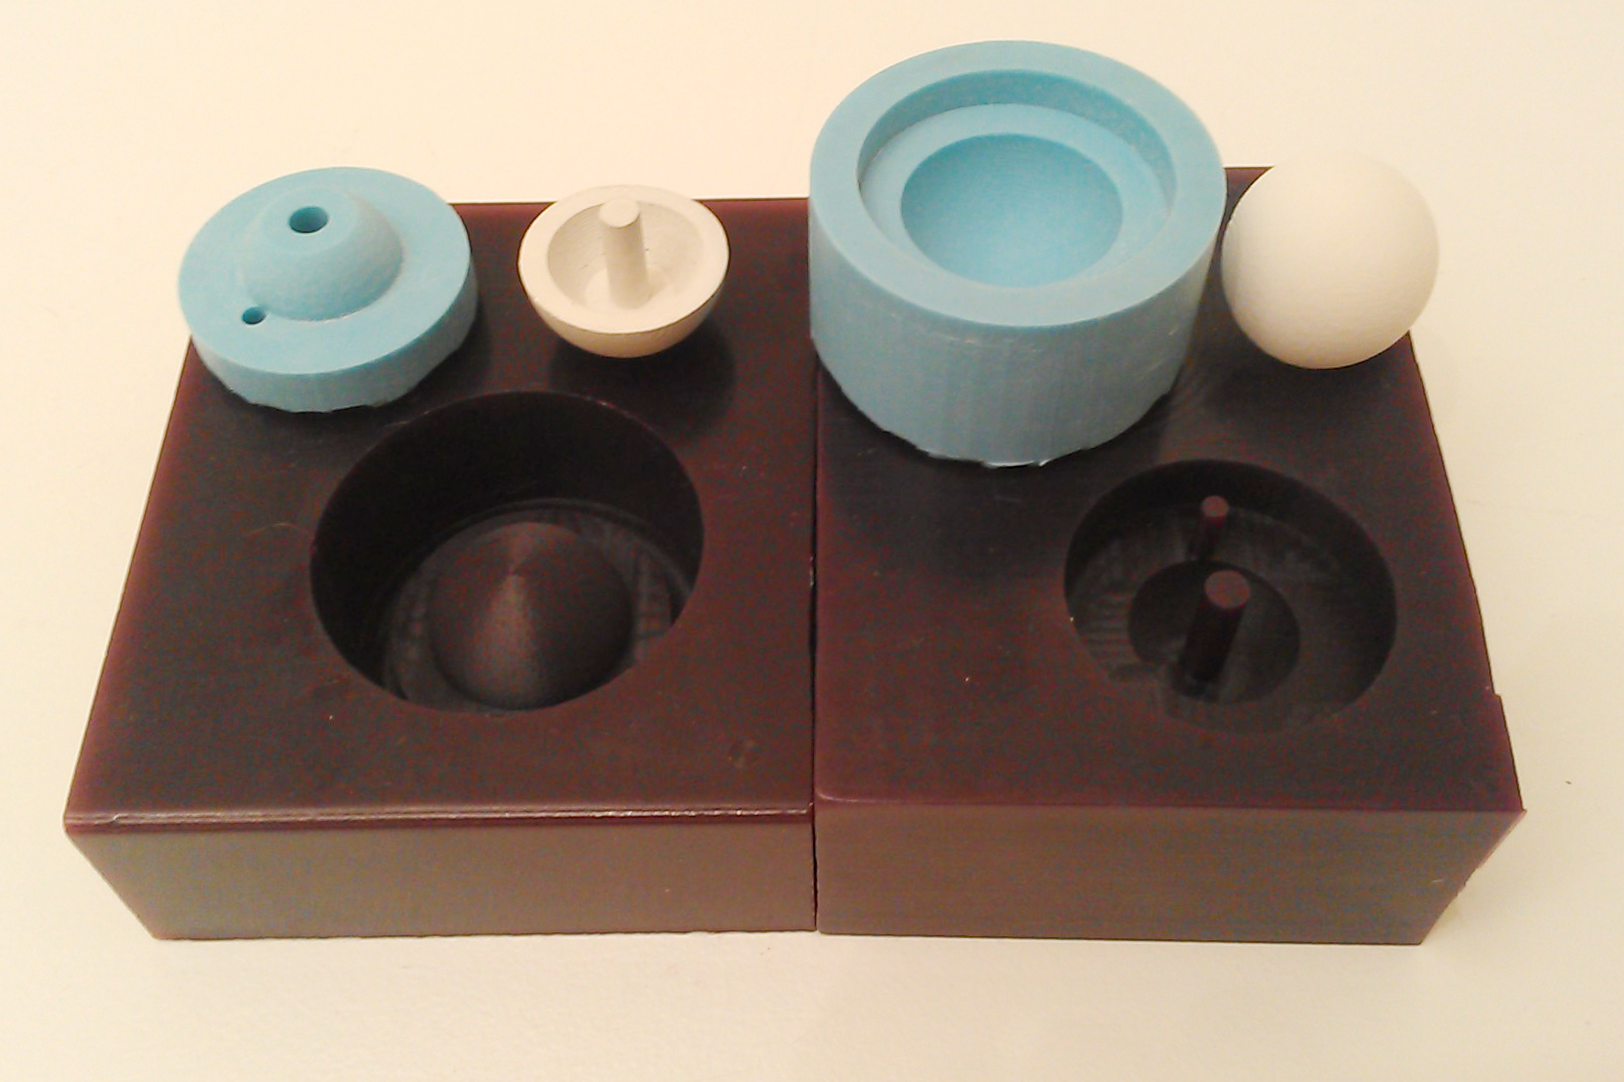 Other option is to use traditional cylinder shape pin and cavities. Following link provide some example of third way of registration.
 - Holes for pouring the liquid and let air leave: You need to have big enough holes for pouring the casting liquid in the rubber mold. While you are pouring the liquid the air needs have a way out of the two side mold (otherwise the liquid will not get in the mold). You have two options two separate holes (recommended) or one big holes that permits at the same time pour the liquid and leave the air out. I would recommend to use a cone like shape for the hole to pour the liquid. It will make easier to fill the mold.
- Walls with some inclination: if you are not using rubber molds will facilitate unmolding.
-
Design thinking on your tools: Some of the finishing milling bits (specially the smaller ones) have different width for the shaft and head.
You need to consider this size difference if your CAM software does not do it for defining the toolpaths. One specially problematic area are the outer walls. You can solve this issue by having some inclination in the outer walls. In addition, you can always try to design your mold in such a way that the tool would not go deeper than the milling bit head.
-
Consider that the tool just can remove material from the top surface: You cannot machine all models (see following picture as example):

-
Registration: If you are fabricating two part molds, you need to ensure that both molds are brought together in the right position. Neil's like that the registration is integrated into the design: See for instance
Machining
- We are using machinable wax to create the positive molds.
- We are using the following milling bits:
- 1/8'' (3.18 mm) Flat milling bit with two flutes (for roughing and finishing)
- 1/8'' (3.18 mm) Flat milling bit with four flutes (for finishing)
- 1/8'' (3.18 mm) Flat milling bit with two flutes (for finishing when you want rounded surfaces at the bottom of the mold)
- 1/16'' (1.58mm) and 1/32'' (0.79mm) flat milling bit with two flutes (for finishing when you want finer details) !OBS :shaft of the milling bit is wider than the head and neck.
- Machining is divided in two process:
- Roughing: You remove big amount of material quickly. You do not take into account the details. You defines big step-in and offsets.
- Finishing: Done after roughing. Removes small amount of material to ensure small details. You define small step-in and offsets. You may use a smaller milling bit or a milling bit with more flutes.
- Both for roughing and finishing you may need to use the following strategies:
- Contour lines: This roughing and finishing strategy finds and cuts just the contour of your figure removing rest of unnecessary parts. It moves in the x, y and z axis at the same time. Contour is removed layer by layer. Layer defined by the cutting-in amount. Resolution is marked by the offset or path interval.
- Scan lines: This finishing strategy moves the tool simultaneously in the x and z axis or y and z axis. The scan lines are separated by offset or path interval
- Adaptive clearing: Roughing strategy that allows to remove big amount of material effectively. It will go deep in the material in several steps, clear unnecessary material and define contour from bottom to up.
- See ![Contours] (http://archive.fabacademy.org/2016/fablabbcn2016/students/375/week12/) for a more clear explanation.
- You can use two software to define the toolpath:
-
Modela Player:
- Recommended software. Comes with SRM-20. Cannot be downloaded to your own computer, but you need to use downstairs computing. Settings for roughing and finishing already tested with the 1/8'' flat milling bit:
-
Modela Player:
 - FINISHING: Use scan lines strategy
 .
.
- Virtual Modela will simulate your final result and provide estimated machining time. CHECK ALWAYS THAT THE FINAL RESULT ARE THE EXPECTED ONES. The simulated results are really realistics. If you want more detail you could:
- Use a different milling bit
- Reduce the cutting-in amount
- Reduce the path interval.
-
Fusion 360:
- Feed rates and speeds not tested. You can use this 2017 fabacademy page as a guide.
- You can make use of Adaptive pocketing (really fast roughing strategy) and many others finishing strategies.
- You can define the shaft's, head's and neck's width of your tool. It is then easier to define toolpaths for different tools.
Molding
- It is really important that you read the safety datasheet of the components before using them.
- Use always gloves, glasses and a ventilated area
- Usually you need to mix at least two components. The mixed ratio is defined either in volume or in weight.
- You should pay special attention to the following times:
-
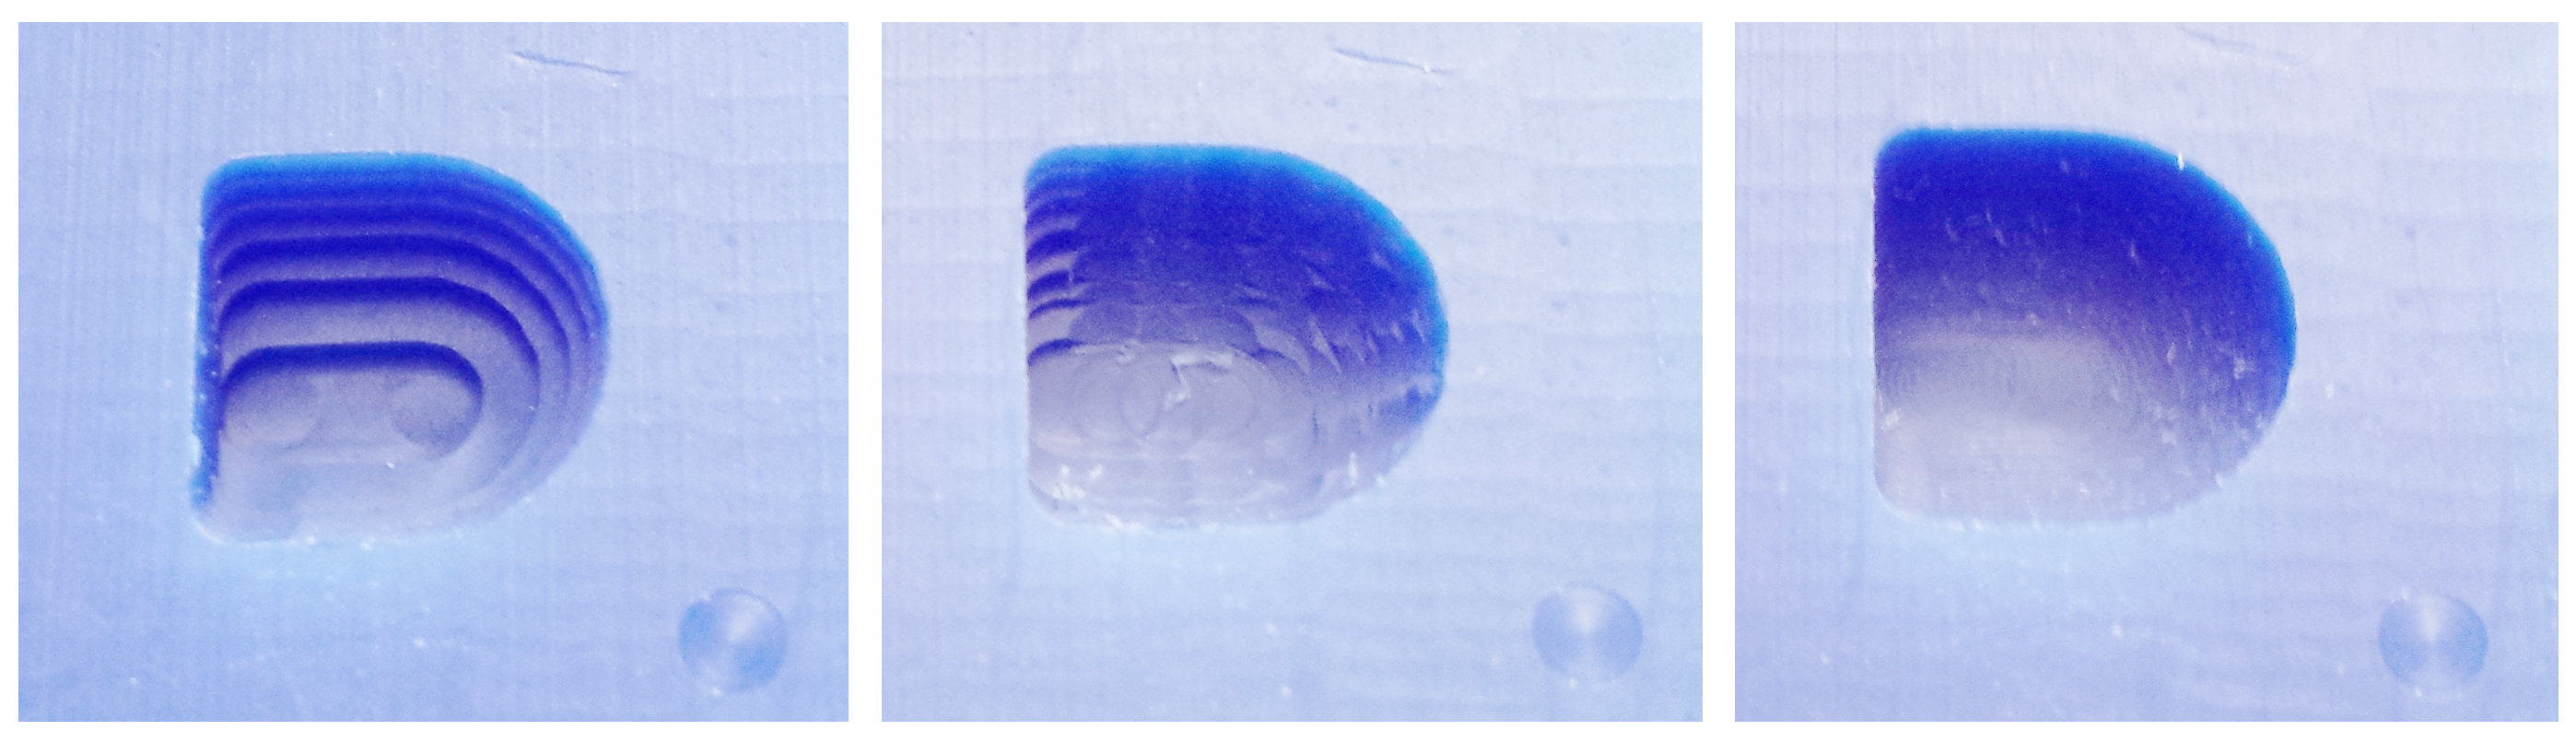
Shelf life: The amount of time that the component can leave in storage. Consider this as expiration date. Following figure shows the result of molding with an opened silicon.

- Pot life: The amount of time that you can mix/vacuum your component before it start to make reaction. You should pour the component in the mold before the pot life.
- Cure time: The amount of time that you need to leave the component resting before unmolding. Additionally, instructions might provide another time specifying the time that it can be used as a mold.
- Use the vacuum machine to remove the air bubbles in the silicon rubber (oomoo)


- When pouring the silicon rubber in the machinable wax do it slowly and with certain angle
- When pouring the plastic inside the silicon rubber mold you can make a funnel out of paper. It will facilitate pouring the plastic in the mold. You can also utilize a syringe, specially if the mold is very thing.

- If you are using hard component directly to the machinable wax mold, do not forget to add a release agent. You might need also some unmolding strategy:

- You may also want to dye your plastic. Use only the provided dyes.