
- Tic Tac Toe Machine
- This week's objectives
- Machine
- Application
- Automation
- Actuation
- Mechanism
- Problems encountered
- During mechanical design and assembly
- During electronics design and implementation
- During software programming
- GRBL and Relative coordinates
- We accidentally burned one arduino board
- Desperation to fix a GRBL problem almost ended with my laptop infected with suspicious virus
- Inconsistent command execution & GRBL randomly dropping instructions without errors
- Development Iterations
- Iteration 1
- Iteration 2
Tic Tac Toe Machine
This week's objectives
- Mechanical Design
- design a machine that includes mechanism+actuation+automation+application
✅ - build the mechanical parts and operate it manually
✅
- design a machine that includes mechanism+actuation+automation+application
- Machine Design
- actuate and automate your machine
✅
- actuate and automate your machine
- Document
the group project
and your individual contribution (this page!)
✅
Machine

Application
Application a device designed to help the user to perform specific tasks
The application for our machine is to play tic-tac-toe against a human adversary, using an aggressive play-to-win AI.
Automation
Automation describes a wide range of technologies that reduce human intervention in processes.
Our machine provides full end-to-end automation for the entire game of tic-tac-toe.

Actuation
Actuation. An actuator is a component of a machine that is responsible for moving and controlling a mechanism or system, for example by opening a valve. In simple terms, it is a "mover".
From the point of view of machine design, Actuators are the parts of the machine that operate in its environments ( to affect it/change it, in some way), while the sensors are the parts that receive information from its environment.
In terms of actuation, our machine has a moving pen, whose tip can be arbitrarily positioned in any position in the operating space/volume.
For all intents and purposes, however the pen will only occupy 2 planes in space:
- the paper plane: when the tip of the pen is touching the surface below the machine. This setting can be used to paint, draw on it or mark it in some way.
- the hover plane: when the tip of the pen is held away from the floor/paper/whiteboard. This position allows us to freely move the pen without leaving marks or painting anything.
Mechanism
Mechanism (engineering), rigid bodies connected by joints in order to accomplish a desired force and/or motion transmission
The machine that we have built has various mechanisms to operate and perform action in all 3 spacial dimensions:
- 1 mechanism to operate on the X axis (1 degree of freedom) using dual stepper motors
- 1 mechanism to operate on the Y axis (1 degree of freedom) using a single stepper motor
- 1 mechanism to operate on the Z axis (1 degree of freedom) using a single servo motor
The combination of these mechanisms allow the machine to have an operating space/volume of approx:
XXX mm x YYY mm x ZZZ mm = XYZXYZ mm3
Here's a short excerpt of the code used to control the machine over the operating space.
Problems encountered
During mechanical design and assembly
TO DO
During electronics design and implementation
TO DO
During software programming
GRBL and Relative coordinates
During our initial iterations, we were having issues when we tried to get the steppers to draw figures on our board, but not when we were trying to move around the board (hovering).
Our initial hypothesis was that maybe GRBL did not support relative coordinates.
- After a bit of research we came across specific documentation (Pg. 3) for GRBL 1.1.2 that clearly indicates that it supports G91 for relative positioning.
- Something else I learned is that "Relative positioning" is called "Incremental" in some environments. This proved useful when googling around, as we found many more hits and useful results.
- A third thing I learned is that there is specific syntax that allows relative coordinates to be used while GRBL is in absolute mode. This syntax uses UVW Commands instead of XYZ, although it seems to be unsupported by GRBL 1.1.
This avenue of research did not help us resolve the issue we were having, and at the end, the problem was fixed by re-tightening all the belts used by the steppers, and doing a soft reset of the shield.
We accidentally burned one arduino board
So, full disclosure... We don't actually know what happened, but we believe it burned/died because it is no longer working in any capacity.
Context: While we were using an Arduino UNO Board, it suddenly stopped working. In front of all of us. And no one was moving around/touching it.
That's not the worst part. The worst part is that we have not been able to find out the root cause of this unexpected event.
Everything worked as normal when we place a new arduino board and reloaded the GRBL config settings, so it's clearly something wrong with the Arduino UNO board, and trying to flash it with the GRBL firmware/library was not possible once it died.
We need to do a bit more research to figure out what happened! A 20$ damage is a huge piece of the budget. We better find answers.
Desperation to fix a GRBL problem almost ended with my laptop infected with suspicious virus
Pro Tip: when developing for GRBL/Arduino, on a Linux machine, with custom software, always click on any "Download Windows Registry Fix.exe" links that may appear in front of you!

Inconsistent command execution & GRBL randomly dropping instructions without errors
Alright! So this was one of the most confusing problems, and one of the most celebrated once it got fixed.
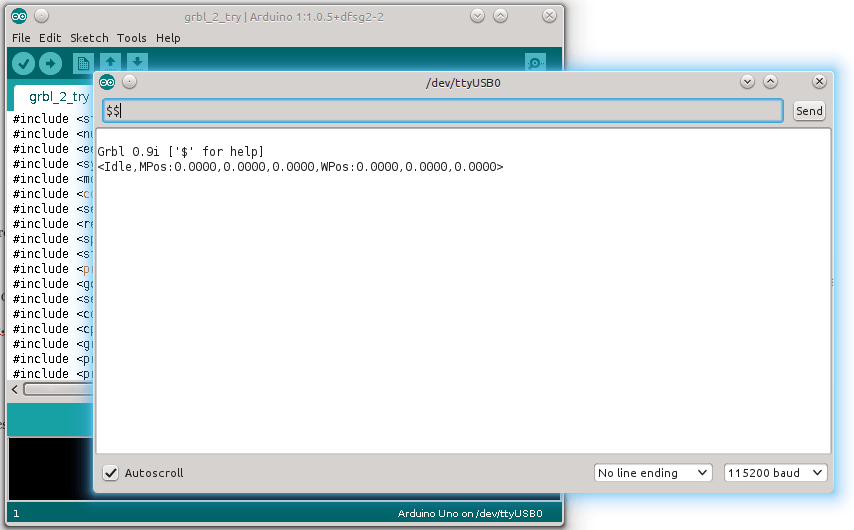
Imagine that Arduino is receiving commands correctly when you send them via the Arduino IDE / Serial Monitor:
But that the exact same commands Sometimes fail when you send them via your custom program:

This problem has all ingredients for the perfect frustration
- The command (any command!) works perfectly on a known platform (Arduino IDE): so it's not hardware issue
- We tested different cables: so it's not a comms issue
- It works sometimes correctly from our program: so it's not an obvious error in our code/library
- All the examples we are finding online have code that looks extremely similar to our custom code (open port, handshake, etc...): so we have not missed anything obvious
- What is it?!
- The answer came to us after a quick question to one of our local instructors (Thanks Josep!
💝 ): 1. It turns out, we had forgotten to send out the "new line" character at the end of our command. 2. The new line command is normally generated when we pressReturnorEnterkey on our keyboards. 3. The same key we press on the Arduino Serial Monitor to "send" the command.
The fix was easy and swift: We just had to add a \n new line character at the end of each command we wanted to
send arduino.serialWrite(command); for a arduino.serialWrite(command + "\n");
It was so obvious, and yet so invisible, until it got fixed.
Life lesson:
- Sometimes you might be in a pit of darkness and divine bliss is just 2 minutes away from you.
- Ask for help sooner: We should have asked for help sooner! After the 1st hour of research, I already had enough answers to ask fully-informed questions. The determination to trying to figure it out without bothering others did not prove particularly useful.
Development Iterations
Iteration 1
Sending custom commands to arduino via Serial Interface
Iteration 2
Sending GCODE commands to Arduino with GRBL installed