-
Mitalee Parikh authoredMitalee Parikh authored

#Project Development This part of the course was longer for me than a couple of weeks. I managed to find access to a lab - FabLab UAE and am very thankful to Hashim for letting me use the resources of the Lab, and Steven for setting this up for me.
Page Summary
- Project Management
- Tracking progress
- Development
- Important and interesting links
- Project Management
Murphy's Law - everything that can go wrong will go wrong. This has happened many a times for me in respect to FabAcademy.
Triage - I have some trouble with this. As I get easily distracted and go into the depth of things without zooming out in time to finish the assignments.
Documentation during development - Fighting procrastination to get better with this.
Demand- vs supply-side time management - Generally I used this for the last 2-3 weeks before the final project submission deadline.
Spiral development, DevOps - This is my favourite. I have started using this in my design practice and various other aspects of life.
Serial vs parallel tasks - I do both depending on the task, the time and the surrounding contexts.
System integration - getting better and better at this with time, documenting this is very difficult because of non compartmentalisation.
Finish quality - I believe in using materials in an honest way to hero their intrinsic properties and not hide them under aesthetic finishes. This makes the underlying parts neat and organised automatically.
- Tracking progress
What tasks have been completed, and what tasks remain?
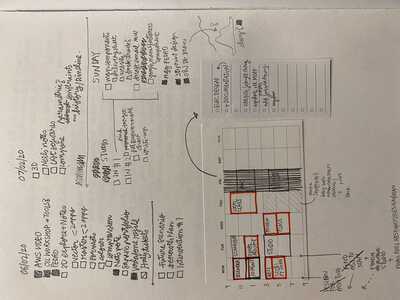
I kept a record of this by making a to-do list every week in my notebook and then assigning time for each task in my calendar. Here are some pictures of my to-dos:

What's working? What's not?
The OLED screen I borrowed from the lab, stopped working after I tried it with an Arduino Uno. I'm not sure what was wrong, but I checked every connection with a multimeter. I tried an I2C scanner detector but it still did not detect the device. I also tried it with a different programming board, and a I2C LCD screen with the same board. But after testing each connecting part, something in the OLED did not work. So finally, I got a new one.
The laser cutter I used at the Lab - a Universal Laser system, had a different kerf in the x-axis and the y-axis. I tried many different combinations of settings and materials. But still could not figure out how to fix this. Eventually I offset my tongue and groove joints different in X- and Y- directions.

I designed and made my PCB using an ATtiny44 microcontroller. Early on I figured that all the different libraries I would need to work the DHT11 and the OLED would not fit in the 4k storage space. So I desoldered the 44 and used an ATtiny84, so that nothing would change but the microcontroller. Eventually I discovered the tiny libraries for OLED and DHT - optimal versions of the full libraries and turned out the code used only 4136 bytes of storage space.
I made the first layout of the PCB trying to make it as compact as possible by keeping parts close together and traces more optimised on space.

Eventually, I changed the layout of the header pins that connect to all different input/ out puts and matched them to their physical location on the machine. This resulted in a much bigger PCB but a very neat layout of all the wiring. I planned it such that the wiring would neatly stretch on the side of the machine, but Neil suggested using a cable manager instead.

I also wanted to add a mobile application to control the machine instead of the physical regulators and switches as the last spiral development cycle including a wifi module.
What have you learned?
Through this project I learnt the most in electronics design and programming. The process of 'How to design a PCB from scratch for what you want the thing to do' as described in the weekly documentation was the most empowering.
- Development