
BIOSILICONE
Tactility & sound impression
Description
A (naturally) yellow, flexible biosilicone, gelatin-based.
Physical form
Solids
Color without additives: transparent, yellow
Fabrication time
Preparation time: 1 Hour
Processing time: 5-10 days
Need attention: every 12 hours, alternate pressing and drying, (press overnight, let dry through the day for example, or leave to dry on a roster). Leave it to dry as long as is feasible with lots of airflow.
Final form achieved after: 10 days
Ingredients
-
Gelatine powder - 48 gr
- Functions as the polymeer (so it becomes a solid)
-
Glycerine - 48 gr
- Functions as plasticizer that bonds with the gelatine (makes it flexible).
-
Water - 240 ml/gr
- To dissolve and mix the polymeer and plasticizer
Tools
- Cooker or stove (optional: temperature controlled)
- Pot
- Scale
- Moulds (I use a modular mold from laser cut 3 mm acrylic sheets here that are held together with screws)
- Spoon
Yield before processing/drying/curing
Approx. 250 ml (make sure to evaporate enough water during cooking time)
Method
-
Preparation
- Weigh your ingredients
- Prepare the mold and find a place where you can leave it for a while, ideally near an open window where there's air flow.
-
Mixing and dissolving the ingredients
- bring the water to the boil
- optional: add natural dye if you wish to use color
- add the glycerine
- add the gelatine
- keep the temperature below 80 degrees celcius while stirring very very slowly and gently to avoid making bubbles. I prefer a simple spoon to do this, not a whisk.
-
Cooking the ingredients
- Simmer and slowly stir the mixture between 60-80 degrees celcius for 20-25 minutes, until it's like a syrup.
- Longer cooking time allows more water to evaporate and as a result it will shrink less during drying. Make sure it's still liquid enought to pour.
-
Casting
- Cast into the mould slowly to avoid bubbles
- Pour from the middle and hold still, let the liquid distribute itself.
- Put the mould away to dry in a cool place with lots of air flow (like near an open window). A warmer place might speed up the drying process but also allow bacteria to grow faster and can result in fungal growth.
Drying/curing/growth process
- Mold depth: 3 x 3mm layers
- Shrinkage thickness: 20-30 %
- Shrinkage width/length: 10-20 %
Shrinkage and deformation control
Letting it dry up to ten days to get to the final form. It will be very flexible at first but will slowly harden. Tends to curl up if it is not pressed down during drying (the design of this mold allows for airflow even when pressed). Laying it on a smooth surface helps to keep it flat, it "sucks" onto the surface.
Curing agents and release agents
None.
Minimum wait time before releasing from mold
3 days
Post-processing
Store in a dry and ventilated room.
Further research needed on drying/curing/growth?
Casting larger volumes without growing fungus/mold and deformation would require further experimentation.
Process
 preparing the mold, Loes Bogers, 2020
 thick mixture, Loes Bogers, 2020
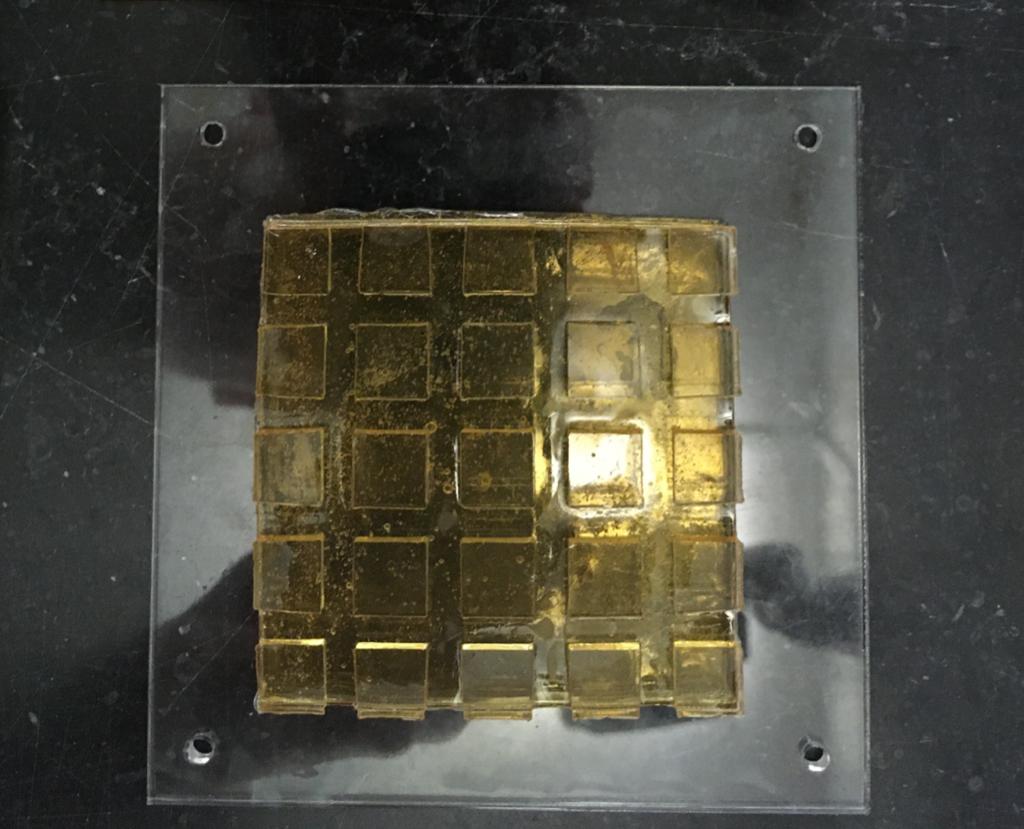 biosilicone slab just after mold release, Loes Bogers, 2020
Variations on this recipe
- Add a natural colorant such as a vegetable dye or water-based ink (e.g. hibiscus, beetroot, madder)
- Add less glycerine for a rigid biosilicone
- Stiffeners such as fibres, yarn or natural debris may be added for more structure and reinforcement.
- Fillers such as almond or sunflower oil, can be added to prevent additional shrinkage but might affect stickyness.
Cultural origins of this recipe
Bioplastic production is older than petrol based plastics. In 1500 BC, people in Egypt were already using glues based on gelatin, casein and albumin for furniture constructions. Gelatin casting as a technique has also been used in production of jelly-based foods such as aspic, jelly desserts and candy.